Another Chance: Gallery Replays
ANOTHER CHANCE:
GALLERY REPLAYS
Jo's Kiss

Quest: Back to School Special
Acquisition: This scene is unlocked by getting a goodbye kiss from Jo.
Walkthrough: After Jo tells you hurry up for the first day of school, get dressed and leave your bedroom. Now in the kitchen, quest Jo and you'll unlock this scene.
Flora's Breakfast

Quest: Back to School Special
Acquisition: This scene is unlocked by letting Flora eat your cereal for breakfast.
Walkthrough: After Flora greets you in the kitchen, quest her — she'll ask you where the breakfast is, but find out you haven't made any. She'll then decide to simply take your cereal, unlocking this scene.
Mrs. L's Lesson
Quest: Day 1, Take 2
Acquisition: This scene is unlocked by entering the homeroom for the first time.
Walkthrough: After arriving at Newfall High, you'll receive another text from the mysterious number, before realizing the bell is about to ring and you should get inside the school. Once there, go to the homeroom and you'll unlock this scene.
Lindsey's Trip
Quest: Day 1, Take 2
Acquisition: This scene is unlocked by walking up the entrance hall stairs with Isabelle.
Walkthrough: After acquiring the permission slip from Mrs. L, leave the homeroom and interact with the Guard's booth to pick up your locker key. Then, quest Isabelle — she'll tell you she wants to sign up for English focus classes first. Walk up the entrance hall stairs and you'll unlock this scene.
Jacklyn's Search

Quest: Art Through Suffering
Acquisition: This scene is unlocked by telling Jacklyn you'd like to sign up for art focus classes.
Walkthrough: After Isabelle tells you she wants to sign up for art focus classes next, meet her in the art classroom. Jacklyn will greet the two of you and introduce herself as the teacher's assistant, before promptly writing Isabelle's name down on the shortlist. Quest her to sign up too and you'll unlock this scene.
Lindsey's Collision

Quest: Loser to the Rescue
Acquisition: This scene is unlocked by colliding with Lindsey during the school tour.
Walkthrough: After Isabelle signs up for gym focus classes, quest her. She'll thank you for the school tour, before realizing Lindsey is about to run into you. The two of you do collide, unlocking this scene.
Additionally, you can choose "She should've paid more attention." and pass up on helping Lindsey to disable romancing with her.
Nurse's Compromise

Quest: Loser to the Rescue or Photogenic
Acquisition: This scene is unlocked by pulling back the curtain to catch the Nurse in a compromising position.
Walkthrough: After Lindsey accidentally runs into you during the school tour, tell Isabelle you're going to get the Nurse. Alternatively, you can choose any of the three other options and conclude the tour as normal. Then, consume a bottle of strawberry juice and walk up the stairs to the first hall — you'll pass out, leading either Flora or Lindsey herself to drag you all the way to the admin wing. When you wake up, they'll ask you if you can get to the Nurse on your own, to which you reply yes.
Once you make your way to her office, you notice she's nowhere to be seen. Interact with the curtain and you'll overhear the Nurse saying Mr. Brown's name. Pull it back and you'll unlock this scene.
Additionally, you can either choose "Smile for the camera!", or mention how it looks like she was having a very wet daydream and then choose "Just one for the yearbook, okay?", to acquire the Nurse's compromising photo.
Lindsey's Exam

Quest: Loser to the Rescue
Acquisition: This scene is unlocked by pulling back the curtain to see Lindsey's boobs.
Walkthrough: After Lindsey accidentally runs into you during the school tour, ask Isabelle to help you get her to the Nurse's office. Alternatively, if you have at least 3 strength points, you can carry Lindsey there by yourself. The Nurse will put her on the bed, before asking you and Isabelle to wait outside while she checks Lindsey for a concussion. Isabelle will then tell you to meet her at the cafeteria.
Before you leave, interact with the curtain — you'll overhear the Nurse asking Lindsey to take off her top so she can have a look at her chest. Pull it back and you'll unlock this scene.
Kate's Kiss

Quest: Stepping on the Rose
Acquisition: This scene is unlocked by spying on Isabelle for Kate, then asking her for a reward.
Walkthrough: After Isabelle confronts Kate about her bad behavior, stay with the latter. Kate will claim that Isabelle needs to be taught a lesson, before telling you to find out what three focus classes she'll pick and what her favorite drink is.
Go back to Isabelle and carry on with the school tour — you'll learn that English, Art, and Gym are her focus classes, and ice tea is her favorite drink. Once she says her goodbyes, quest Kate. If you ask her for a reward, she'll first argue that your reward is being in her presence, but later give in and allow you to get down on all fours and kiss her shoe. Choose "Thank you, ma'am!" to unlock this scene.
Flora's Relief

Quest: Chili Con Carnal Sin
Acquisition: This scene is unlocked by helping Flora clean off.
Walkthrough: After Flora asks you to get her her phone with the special touch recipe in the bathroom, make your way up there — you'll notice it's nowhere to be seen. Call Flora with your own phone to reveal that hers is hidden below all the dirty clothes in the laundry basket. Pick it up, and then return to Flora.
Once you head back downstairs, she'll be freaking out. Turns out she somehow got chili in her pussy while you were gone, and is now burning up. Flora then runs off to the bathroom to wash herself off, and you can follow her inside. If you do, she'll reluctantly take off her clothes and step in the shower. Help her clean off and you'll unlock this scene.
Kate's Apology

Quest: Make a Wish and Blow
Acquisition: This scene is unlocked by getting an apology (consensual or not) from Kate.
Walkthrough: After the school tour is over, Mrs. L approaches you and commends you for stepping out of your comfort zone. As a reward, she gifts you a courage badge — the same one she got for stepping out of hers. Go to your bedroom and put it on display in the bookshelf next to your bed, then interact with your computer. Once it gets dark, go to sleep.
Flora will wake you up the next day by knocking on your door. Open it up, and she'll state that classes have started an hour ago. Get dressed and head to school. You'll realize most of the doors are locked, though, and no one seems to be around... except for Kate, who can be quested in the gym. She smirkly reveals that something bad happened to Isabelle, and school was closed for the day.
Fed up with her lack of sympathy and general bitchy behaviour, you decide to strike back — either with imposing words, or just sheer brute force —, unlocking this scene.
Nurse's Excavation

Quest: Search & Rescue
Acquisition: This scene is unlocked by giving the Nurse up to Kate.
Walkthrough: After you discover a trail of candy wrappers leading into the art classroom, follow it. The trail ends in front of the supply closet, but its door is locked. Kate suddenly shows up, having also followed the candy wrappers, and asks you if you have managed to find the Nurse yet.
You can report that she's in the supply closet, and Kate will then tell you to open it. If you have at least 5 strength points, you can propose to break it open. If you don't, you can instead use a high-tech lockpick — crafted by combining a safety pin (found in the lollipop jar in the Nurse's office) with a ball of yarn (found on the leftmost desk in the homeroom) — on it.
To the surprise of both of you, it's actually Maxine's cat who comes out of the supply closet, having been put in there by the Nurse as a decoy. Pet the cat once, then give her one of the many candy wrappers from the trail — she'll run outside the school and lead you right to the Nurse's hiding spot.
Interact with the bush to expose her. She'll get startled by your presence and try fleeing again. But before she's able to, you reveal that Kate has asked you to find her. Choose "I'm taking you to her right now." to unlock this scene.
Flora's Dare
Quest: No True Scotswoman
Acquisition: This scene is unlocked by beating Flora in the cup game twice, then daring her to kiss Isabelle.
Walkthrough: After Mrs. L locks you in the homeroom together with Isabelle and Flora, read the instructions on the blackboard. They'll inform you that in order to unlock the door, you must first decide as a group which one of you three is the most deserving of a secret reward.
Interact with Mrs. L's desk to acquire three coffee cups, and interact with the trash can to acquire an eraser. Then, use each one of them on the table between Isabelle and Flora. Once all items have been placed, interact with the table to call Flora over. You tell her if she can guess which cup the eraser is under, you'll give up your claim on the reward. But if she can't guess, she'll have to give up hers. Flora promptly accepts your challenge.
If you have at least 5 intellect points, you can rig the game. If you don't, place the eraser under either the left or right cup. Flora will wrongly guess the middle one, before demanding a best of three. Accept her request, but state that if she loses again, she'll have to accept a dare.
Just like the first time, place the eraser under either the left or right cup — Flora will wrongly guess the middle one once again. You then tell her her dare is to kiss Isabelle, but she refuses. If you have at least 3 charisma points or at least 3 intellect points, you can convince her to go through with the dare, unlocking this scene.
Mrs. L's Workout

Quest: The Missing Tapes
Acquisition: This scene is unlocked by searching for the High-intensity Omni-flex Training videotapes on the internet.
Walkthrough: After Mrs. L reveals that she used to follow a series of calisthenics videotapes called "High-intensity Omni-flex Training", you'll overhear an argument coming from the locker room. If you eavesdrop on it, a woman's voice will confront Mrs. L for telling you about the videotapes, which only piques your interest. Quest Lindsey for guidance. She doesn't recognize the name, but Flora — who barged in during your conversation — reminds you that Jo used to be into all sorts of training programs.
Quest Jo to ask if she still has those tapes somewhere. She says they should be down in the basement, but she'd have to go there and check. She then asks you to take care of the laundry in the meantime. If you have at least 6 intellect points, you can get Flora to do it for you. Otherwise, you're on your own.
Once the laundry is taken care of, quest Jo again. She'll report that she found a lot of old tapes, but not the ones you asked for. As a last resort, go to your bedroom and interact with your computer to search for the videotapes on the internet. You only manage to pull a crypted image and an email address — which you send a message to. You then decrypt the image, unlocking this scene.
Nurse's First Strike

Quest: Stolen Hearts
Acquisition: This scene is unlocked by leaving the Nurse's office following the use of a strike.
Walkthrough: After buying (or stealing) all 10 doughnuts in the cafeteria to lure the Guard out of his booth, the Nurse will approach you and ask you to sell her one, claiming she's really craving something sweet. Agree to let her have one, but not for retail price. If you have her compromising photo and at least 2 Nurse lust points, you can propose to start a tally — the doughnut will add one strike to it, which can later be traded for favors.
The next time you enter the Nurse's office, you'll notice there is now a notebook on her desk. Interact with it and use your strike on the forced nudity (office) option. The Nurse will reluctantly get naked, before locking her clothes in one of the drawers for the rest of the day. Leave the office and you'll unlock this scene.
Mrs. L's Dance
Quest: Stolen Hearts
Acquisition: This scene is unlocked by watching the school surveillance footage.
Walkthrough: After luring the Guard out of his booth, go to your bedroom and take the flash drive on top of the drawers. Go back to school and use it on the Guard's booth to download the surveillance footage. Then, go back to your bedroom and use the flash drive on your computer to watch it — you'll learn that it was Lindsey who broke into Isabelle's locker. Continue watching the surveillance footage and you'll unlock this scene.
Nurse's Garden

Quest: Potted Weeds
Acquisition: This scene is unlocked by blackmailing the Nurse into plowing the field.
Walkthrough: After consuming the mysterious package and acquiring the gigglypuff seeds, go to the forest glade. You'll find a field that's perfect to plant them, but needs to be plowed first. Fortunately for you, there's a creepy hut with all sorts of old farming equipment right next to it… except the door is locked.
Go back home and take the umbrella in the hallway, then use it on the creepy hut — you'll acquire the Power-Plower 3000. It can be used on the field, but you soon realize it would be a lot of work. If you have the Nurse's compromising photo, quest her instead. You tell her you've been getting into agriculture and were hoping she could give you a hand, reminding the Nurse that her job and reputation are at stake. Now at the forest glade, quest her again and you'll unlock this scene.
Jo's Tea

Quest: Potted Weeds
Acquisition: This scene is unlocked by helping Jo scratch her itch.
Walkthrough: After harvesting the gigglypuff leaves, go back home. Take the kettle in the kitchen and place it on the stove. Add both a bottle of water and the gigglypuff leaves on it. Finally, go to the hallway upstairs and take the lamp next to your bedroom door, then use it on the kettle to turn up the heat — you'll acquire the gigglypuff tea.
Quest Jo to reveal you've brew her a cup of tea to help with her throat pain. She'll take a few sips and state that it's very effective, before realizing she's getting sleepy. Jo will then tell you she's going to bed and say her goodbyes. But as she starts to undress and stumble on the way to her bedroom, she suddenly falls on top of the kitchen counter, completely knocked out.
Still unconscious, Jo will start sleep talking about how she loves Flora, how you need to take better care of yourself, and how she's feeling itchy. Scratch her itch and you'll unlock this scene.
Isabelle's Hug

Quest: Buried Truths
Acquisition: This scene is unlocked by helping Isabelle bury the box of chocolates.
Walkthrough: After giving Isabelle her box of chocolates back, she'll ask you to help her bury it. If you already have a shovel, the two of you will agree to meet in the forest glade at sunset. If you don't, you can craft one by combining a stick (found in the beaver dam in the same forest glade) with an empty can of soup (found full in the lunch box in your locker). Quest Isabelle once that's taken care of, and you'll go to the forest glade together.
There, quest Isabelle again and then use the shovel on the car tire. She'll share some memories of her sister with you, before burying the box of chocolates. Isabelle will then ask you if she can hug you, unlocking this scene.
Mrs. L's Strokes
Quest: Poolside Story
Acquisition: This scene is unlocked by getting into the kiddie pool with Mrs. L.
Walkthrough: After getting Isabelle to help you writing a petition to open the pool early, and waiting 4 hours to let people add their signatures, hand it to Mrs. L. She'll be impressed by your effort and propose that you meet her at the pool to figure out an alternative.
Go to the sports wing and interact with the pool entrance. Mrs. L will already be there, and tell you she booked the gym for the next hour, but also ask you to keep it a secret. The two of you enter the gym, and you notice there is a kiddie pool in there. She quickly changes into her swimsuit, before asking you if you're ready to get started. Choose "I was born ready." to unlock this scene.
Alternatively, if you tell her the kiddie pool and the secrecy have made you unsure, she'll promise you it's going to be fine. Choose "Okay, let's give it a go…" to unlock this scene.
Jacklyn's Meal

Quest: The Statement
Acquisition: This scene is unlocked by cooking Jacklyn dinner.
Walkthrough: After asking Jacklyn out on a date and getting both Jo and Flora to leave the house for the night, go to the kitchen. You can choose to make a salad, get Flora to cook for you, or figure it out later. Once that's taken care of, go to sleep. You'll wake up the next day to a text from Jacklyn. Get dressed, meet her downstairs and you'll unlock this scene.
Jacklyn's Pegging
Quest: The Statement
Acquisition: This scene is unlocked by telling Jacklyn that you want her to fuck you.
Walkthrough: After waking up to a text from Jacklyn, get dressed with Flora's spiked choker from her emo phase and Jo's stolen stockings, then meet her downstairs. The two of you have dinner together and chat for a bit until she hears a strange noise. Go to your bedroom and interact with your closet — Flora will jump out, having been hiding there to spy on your date, and then storm out of the room. You and Jacklyn decide to leave and make a statement.
Now outside the school, quest Jacklyn. She'll ask you what kind of statement it should be, before you two put your masks on and get to work on the school bus. Once it's done, she'll ask you what's on your mind. Choose "That I want you to fuck me." to unlock this scene.
Jacklyn's Anal
Quest: The Statement
Acquisition: This scene is unlocked by telling Jacklyn that you want to put your dick in her ass.
Walkthrough: After waking up to a text from Jacklyn, get dressed and meet her downstairs. The two of you have dinner together and chat for a bit until she hears a strange noise. Go to your bedroom and interact with your closet — Flora will jump out, having been hiding there to spy on your date, and then storm out of the room. You and Jacklyn decide to leave and make a statement.
Now outside the school, quest Jacklyn. She'll ask you what kind of statement it should be, before you two put your masks on and get to work on the school bus. Once it's done, she'll ask you what's on your mind. If you have at least 8 Jacklyn lust points, choose "That I want to put my dick in your ass right now." to unlock this scene.
Flora's Sleep
Quest: Tiny Thirsty Tree
Acquisition: This scene is unlocked by stopping Flora from baking more cake.
Walkthrough: After Flora comes knocking on your door late at night claiming she needs more cake, stop her from baking and you'll unlock this scene.
Flora's Forest

Quest: Tiny Thirsty Tree
Acquisition: This scene is unlocked by helping the vines assault Flora.
Walkthrough: After the vines drag Flora to the Nurse's office, follow them.
Cause all vines to go for Flora's body and you'll unlock this scene.
Flora's Hug
Quest: Tiny Thirsty Tree
Acquisition: This scene is unlocked by stopping the vines from assaulting Flora.
Walkthrough: After the vines drag Flora to the Nurse's office, follow them.
Force all vines to let go of Flora's body and you'll unlock this scene.
Lindsey's Catch
Quest: Nothing Wrong With Me
Acquisition: This scene is unlocked by catching Lindsey before she crashes.
Walkthrough: After walking up the entrance hall stairs, you'll notice Lindsey is running across the hall, but has slipped and is about to crash. Swoop in and you'll unlock this scene.
Lindsey's Crash

Quest: Nothing Wrong With Me
Acquisition: This scene is unlocked by watching Lindsey fall down the entrance hall stairs.
Walkthrough: After walking up the entrance hall stairs, you'll notice Lindsey is running across the hall, but has slipped and is about to crash. Watch her crash and you'll unlock this scene.
Lindsey's Spurt
Quest: Nothing Wrong With Me
Acquisition: This scene is unlocked by cleaning up the mess from the broken water fountain.
Walkthrough: After proposing to refill Lindsey's bottle, use it on the water fountain in the first hall. The water fountain then breaks, and you decide to plug it with your hoodie — however, the hall is still a complete mess. If you decide to clean it up, Lindsey will return from practice once all water puddles have been mopped up and approach the broken water fountain, unlocking this scene.
Kate's Spurt

Quest: Nothing Wrong With Me
Acquisition: This scene is unlocked by not cleaning up the mess from the broken water fountain, then staying quiet when Kate tries to remove your hoodie.
Walkthrough: After proposing to refill Lindsey's bottle, use it on the water fountain in the first hall. The water fountain then breaks, and you decide to plug it with your hoodie — however, the hall is still a complete mess. If you decide to ignore all responsibilities and run, Kate will be waiting for you once you return to the first hall. She'll quickly get bored with you, and then approach the broken water fountain. Stay quiet about it and you'll unlock this scene.
Lindsey's Hug

Quest: Nothing Wrong With Me
Acquisition: This scene is unlocked by telling Lindsey you like her wearing your shirt.
Walkthrough: After Lindsey gets absolutely drenched by the water fountain, you tell her to hide in the art classroom. Catch up with her and you'll realize she has taken her soaked clothes off and is completely naked. She'll plead you to stop looking and ask you to get her a set of dry clothes from the women's locker room. Before leaving, you offer to lend her your shirt until you're back.
Quest Flora and she'll reluctantly agree to get you Lindsey's bag. Then, bring it back to her, who'll be glad to see you found it. If you have at least 5 Lindsey lust points, choose "Sure did, but I kinda like you wearing my shirt." to unlock this scene.
Lindsey's Relief
Quest: The Glowing Spider Eggs
Acquisition: This scene is unlocked by trying to sneak a photo of Lindsey in the bathroom stall.
Walkthrough: After deceiving the Guard and entering the women's bathroom, search through any six interactables in it. Lindsey will appear out of nowhere, asking you what you're doing in there. You tell her that Maxine wanted you to take a picture of glowing spider eggs, but that you haven't found any and you have looked everywhere.
She then comes up with an idea — you could instead photograph her keyring, which is a miniature solar system with all the planets, and it's also fluorescent. You promptly snap a picture of it, before Lindsey tells you she needs to use the bathroom now. The two of you say your goodbyes and she disappears into the stall… without even checking if you left. Try to sneak a photo of her and you'll unlock this scene.
Note: Trying to sneak a photo of Lindsey will also disable romancing with her.
Jo's Assignment
Quest: Table Manners
Acquisition: This scene is unlocked by hiding under the teacher's desk.
Walkthrough: After waking up and realizing you're going to be late for class, go to school and interact with the homeroom door. Kate will show up and ask you where you think you're going, before revealing there are no classes today, only cheer practice. She'll then call her cronies and tell you to get on your knees. But instead of complying, you run away and lock yourself inside the homeroom. The girls try to charm you to no avail, and Kate soon decides to go get someone with a key. Hide under the teacher's desk and you'll unlock this scene.
Jacklyn's Helping Hand
Quest: The Ley of the Land
Acquisition: This scene is unlocked by asking Jacklyn to help you unscrew the loose panel in the secret locker.
Walkthrough: After the Ley Line Locator successfully locates the 4th node with the help of the three magnets, it will materialize a new line leading to the secret locker. When you open it, you'll notice how its panel is loose, and the screws could be removed with a screwdriver-like tool. Fortunately for you, Jacklyn has really long nails — quest her and ask to borrow her hand. She'll misinterpret your request, assuming you were insinuating a handjob. If you have at least 5 Jacklyn lust points, choose "I'm game if you are." to unlock this scene.
Kate's Punishment
Quest: Twisted Fate
Acquisition: This scene is unlocked by letting Kate and her cronies tie you up.
Walkthrough: After entering the gym, Kate will approach you and ask you if you have come to perv on the cheerleaders again. If you do any of 1) provoking her and fighting back while having less then 8 strength points, 2) provoking her and claiming you're a decent escape artist, 3) provoking her and running away, then getting caught, or 4) asking her for permission to watch the practice, Kate will get the cheer team to tie you up, unlocking this scene.
Isabelle's Judgement

Quest: Gathering Storm
Acquisition: This scene is unlocked by calming Isabelle down.
Walkthrough: After taking both Isabelle and Spinach to your bedroom, write Maxine an email proposing that she gives Isabelle's locker back in exchange for her cat. One hour later, you'll get a response declining your offer. Furious with the situation she finds herself in — losing her sister to bullying, only to get bullied herself —, Isabelle comes up with a radical plan: sending Maxine her cat's bloody head. Choose "That's enough, Isabelle." to unlock this scene.
Kate's Prize

Quest: Twisted Desire
Acquisition: This scene is unlocked by either giving up or losing to Kate in the challenge.
Walkthrough: After collecting the first three paper stars (blue star: interact with the aquarium in the admin wing; red star: interact with the bus outside Newfall High; green star: interact with the piano in the arts wing), Kate will show up and claim you've only challenged her to be in her presence, before asking you to admit defeat so you can move on to more interesting things. Accept her proposal and you'll unlock this scene.
Alternatively, you can refuse to give up and collect the two remaining paper stars (black star: interact with the skeleton in the Nurse's office; gold star: interact with the door to the women's bathroom in the sports wing, then quest Isabelle). After she hands you the gold star and leaves, Kate will ask you to see it. If you agree, she'll snatch it out of your hands and tell the other cheerleaders she was the one who found it. Do not dispute her words and you'll unlock this scene.
Kate's Forfeit

Quest: Twisted Desire
Acquisition: This scene is unlocked by defeating Kate in the challenge, then asking for a blowjob as the forfeit.
Walkthrough: After collecting the first four paper stars (blue star: interact with the aquarium in the admin wing; red star: interact with the bus outside Newfall High; green star: interact with the piano in the arts wing; black star: interact with the skeleton in the Nurse's office), you'll realize the fifth and last paper star is hidden in the women's bathroom. Quest Isabelle and ask her to find it for you. She'll eventually hand you the gold star and leave, and then Kate will ask you to see it.
If you agree to let Kate take a look at the gold star, she'll snatch it out of your hands and tell the other cheerleaders she was the one who found it. If you have at least 8 intelligence points and Isabelle's phone number, you can call her and have her reveal to the cheerleaders you found the gold star and had it in your possession when she left the sports wing.
If you refuse to let Kate take a look at the gold star, she'll tell the other cheerleaders you cheated by getting Isabelle to help you. You will then argue that the rules said you had to figure out where the stars are, and then bring them back — which is what you did.
Kate finally admits defeat, meaning you get to pick a forfeit. Choose "I want a blowjob." to unlock this scene.
Maxine's Experiment

Quest: Hooking Up
Acquisition: This scene is unlocked by helping hook Maxine up to the internet.
Walkthrough: After Jo and the Guard interrogate you about the missing power supply units, go to Maxine's office and quest her. She reveals that she was the one who stole them, and she now has everything she needs to be hooked up to the internet. Maxine then lubricates the power cable, before promptly pulling her pants down and handing it to you, unlocking this scene.
Jacklyn's Appraisal
Quest: King of Sweets
Acquisition: This scene is unlocked by showing the King of Sweets to Jacklyn.
Walkthrough: After Flora helps you find the inspiration for your art project, go to the art classroom and then interact with the easel that is closest to the door. You decide that a pen is too cliché, and that you need something truly unique for the linework.
Here, you can use either a high-tech lockpick — crafted by combining a safety pin (found in the lollipop jar in the Nurse's office) with a ball of yarn (found on the leftmost desk in the homeroom) —, or a specialized fuse cable replacement tool — crafted by combining a big lollipop (found in the lollipop jar in the Nurse's office) with a plastic fork (acquired after completing Punked). Once the canvas has been sketched out, it's time to add some color to it.
With your piece of art now complete, quest Jacklyn. You tell her you have something to show her, unlocking this scene.
Isabelle's Lesson

Quest: Chops and Nocs
Acquisition: This scene is unlocked by teaching Isabelle how to play the piano.
Walkthrough: After Isabelle asks you to play her a song by Chopin, go to the computer room and interact with the leftmost computer to search for a music score on the internet. Once you find one, trying to print it out will reveal that the printer is not plugged in. Take the blue cable from the box of cables, then use it on the printer to acquire the Chopin music score.
Quest Isabelle and tell her you're ready to fulfill her request. She'll get excited, before promptly heading to the fine arts wing — follow her footsteps, then quest her again. She reveals that she told a few people on the way that there's a mini-concert happening, and the thought of performing in front of a crowd immediately makes you nervous. You have two options here:
Use the Chopin music score on the piano. The crowd eventually arrives, but you manage to put your anxiety aside and perfectly play "Nocturne Op. 9, No. 1" by Chopin, leaving Isabelle impressed.
Interact with the piano, then confirm you'd like to play without the score. If you have at least 5 intellect points, the crowd eventually arrives, but you manage to put your anxiety aside and improvise a different song, leaving Isabelle impressed.
If you don't, the crowd eventually arrives and you quickly realize this wasn't a good idea. You try to improvise a different song, but fail to hit even a single note, leaving Isabelle guilty of her idea.
Regardless of the outcome, she leans against the side of the piano and asks you to teach her the song. You agree to give her a private lesson, unlocking this scene.
Flora's Shower
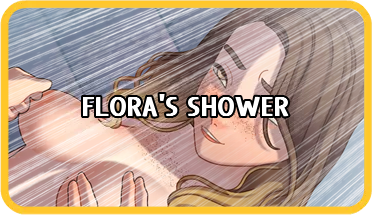
Quest: Squid Game
Acquisition: This scene is unlocked by sharing a shower with Flora.
Walkthrough: After Cuthbert assists you in slashing away all the vines that had latched onto Flora, she relievedly gets up and thanks you both for your efforts — but more so Cuthbert's. Suddenly, he squirts ink at your eyes, leaving you momentarily blind. You ask Flora for help, and she agrees to lead you back home.
The two of you eventually make it to the bathroom, where you then ask Flora to turn on the shower for you. She agrees to do so, but not before getting you to undress in front of her, insisting that it's only fair due to the chili incident in Chili Con Carnal Sin. You take off your clothes and hop in the shower, only to realize Flora has done the exact same thing.
If you have at least 15 Flora love points, you can hug her from behind. She thanks you for saving her squid, and then turns in your arms to face you. The two of you exchange a wet kiss, before you tell her that she needs to tell you to stop... but Flora refuses to do so.
If you have at least 10 Flora lust points, you can place your hand on her ass. The two of you exchange some childish insults before she tells you to move back. Flora then gets on her knees and wraps her lips around the tip of your dick, claiming that you had some ink in there, and she needs to suck it out.
Unable to think straight, you push her against the shower wall, unlocking this scene.
Lindsey's Solo Dance

Quest: Dead Girl's Score
Acquisition: This scene is unlocked by playing the King's Bard album in the music classroom.
Walkthrough: After Lindsey hears you playing a song on the piano, the two of you make some small talk and she reveals that she's into medieval music. Coincidentally, you happen to have a first edition album of her favorite band somewhere. Offer to bring it to school so you can listen to it together in the music classroom, then quest Jo — she'll agree to dig through the basement for you in search of it. Quest her again at a later time, and she'll hand you the King's Bard album.
Quest Lindsey and ask her if she wants to listen to it. She looks eager, but states that she needs to go to practice first, so the two of you agree to meet up in the music classroom in an hour. Head there and wait for her. Once Lindsey shows up, use the King's Bard album on the stereo system, then quest her one last time. She'll have a look at the cover, and the excitement makes her start dancing on her own, unlocking this scene.
Lindsey's Partner Dance
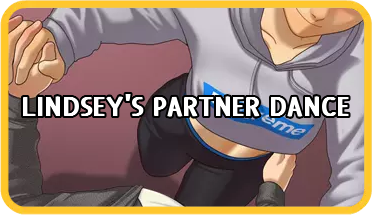
Quest: Dead Girl's Score
Acquisition: This scene is unlocked by having Lindsey play the King's Bard album in your bedroom.
Walkthrough: After Lindsey hears you playing a song on the piano, the two of you make some small talk and she reveals that she's into medieval music. Coincidentally, you happen to have a first edition album of her favorite band. If you have at least 10 Lindsey lust points, invite her to come over to your house so you can listen to it together, then quest Jo — she'll agree to dig through the basement for you in search of it. Quest her again at a later time, and she'll hand you the King's Bard album.
Call Lindsey on your phone to let her know that you've found it, and she'll agree to come over at 8:00 PM. You now have an opportunity to give your room a once-over. Take the vacuum cleaner from the storage closet in the hallway, then go to your bedroom. Once you're done cleaning it up, interact with the door and you'll hear a door bell — it's Lindsey, and she's coming up the stairs!
Quest her. She'll have a look at the cover, and gush over the Deathless Bard, the Excalifender, and Morgan Leeman's signature. You then tell her to put it in your computer, and she happily obliges. As the song starts playing, Lindsey starts to to dance on her own before asking you to join her. You reluctantly accept her request, unlocking this scene.
Additionally, once the song ends and Lindsey tells you she should probably get going, if you have at least 4 love points you can offer to give her the King's Bard album. Ecstatic, she gets up on her tippy-toes and leans in, unlocking the "Lindsey Kiss" scene.
Lindsey's Kiss

Quest: Dead Girl's Score
Acquisition: This scene is unlocked by giving Lindsey the King's Bard album.
Walkthrough: After Lindsey hears you playing a song on the piano, the two of you make some small talk and she reveals that she's into medieval music. Coincidentally, you happen to have a first edition album of her favorite band. Offer to give it to her, then quest Jo — she'll agree to dig through the basement for you in search of it. Quest her again at a later time, and she'll hand you the King's Bard album.
Call Lindsey on your phone to let her know that you've found it, and she'll agree to come over at 8:00 PM. Once she arrives, quest her. She'll have a look at the cover, and gush over the Excalifender, the Deathless Bard, and Wilhelm Tattle's signature. If you have at least 10 Lindsey love points, tell her you've never seen her this excited before. Lindsey brings up how crazy it is that you had a signed original of her favorite band, and the two of you wonder if it could be fate. She seems to be sure of it, but you're not. So, to convince you, Lindsey gets up on her tippy-toes and leans in, unlocking this scene.
Kate's Papaya

Quest: Paint It Red
Acquisition: This scene is unlocked by peeking in on Kate and Lacey in the English classroom.
Walkthrough: After Jacklyn informs you that Maxine has borrowed the school's only bucket of red paint, go to her office. She's nowhere to be seen, but has left clues about where she's gone — and interacting with the note on her chair will reveal a riddle. With or without Isabelle's help, you figure out that it's referring to the roof, where another note has been placed on the greenhouse door.
A second riddle is revealed, and this time you conclude — again, with or without Isabelle's help — that it's referring to one of the classrooms. As you approach the English classroom, you overhear voices from what appears to be Kate and her cheerleader posse. You try to sneak a peek, but realize that the door is locked. If you have a high-tech lockpick — crafted by combining a safety pin (found in the lollipop jar in the Nurse's office) with a ball of yarn (found on the leftmost desk in the homeroom) —, choose "Locks can't stop me!" to unlock this scene.
Flora's Distraction
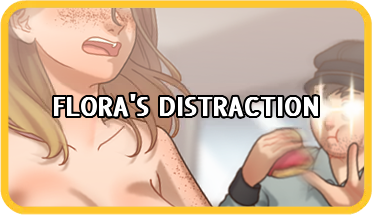
Quest: Stainless Steal
Acquisition: This scene is unlocked by convincing Flora to get naked and streak across the hall.
Walkthrough: After Flora agrees to help you steal a pair of handcuffs from the Guard, it's time to go money hunting for the Scarlet Starlet's Cutie-Harlot skirt. There are many dollar bills scattered all over the map — with their spawning chance having been upped from 25% to 50% during this quest —, and you need to collect a whooping $2499 before you can buy it. Once enough money has been yoinked, interact with the computer in your room and order the Cutie-Harlot, then wait for its package to arrive.
The next day, give the skirt to Flora. She'll excitedly try out a few outfit combinations, before settling for a knot on her regular shirt to go with it. You then remind her that she now needs to fulfill her end of the bargain — distracting the Guard while you sneak into his booth. Go to the school's entrance hall and call her on your phone. Flora will show up shortly after, and ask you what the plan is. If you have at least 6 Flora lust points, choose "Get naked and streak across the hall." and then promise her to not take Jacklyn to prom at the end of the year to unlock this scene.
Nurses's Wiggle

Quest: Venting Frustration
Acquisition: This scene is unlocked by finding an alternative plan instead of pulling the Nurse out of the vent.
Walkthrough: After the fishing hook you were hoping to borrow from Maxine ends up getting stuck in the vent in the clubroom, go to the Nurse's office. If you have the Nurse's compromising photo, tell her she's going into the school's vents for you — she'll reluctantly agree to do so, but you assure her she's going to be nice and slippery.
Return to Maxine and ask her if she has any gadgets that could help you communicate with the Nurse. She'll hand you two walkie-talkies and her old camera, now outfitted with an x-ray function for walls and metal. Then, take the body oil from the supply closet in the art classroom before heading back to the Nurse's office. Quest her and announce that you now have to get her ready... by stripping her down.
Once the Nurse has entered the school vents, roam around the school. She'll call you twice on the walkie-talkie in the meantime, conceding that she needs you to come find her. Go to the sports wing, and she'll call you one last time. The two of you make some small talk, when Jo suddenly shows up wondering who you're talking on the walkie-talkie with, to which you dismiss as it being you just playing pretend. Finally, go to the gym and interact with Maxine's camera in your inventory.
The Nurse appears to be dehydrated and not talking too much sense, so it's up to you to get her safe and sound to the clubroom — here, she's going to ask you where should she go next, and you need to pick a directon for her (the optimal route being "Left." while she's in the gym, then "Straight." while she's in the art classroom). When the Nurse eventually makes her way to the clubroom, use a bottle filled with any liquid on the vent there. She'll drink it up and start to feel better, allowing her to take the fishing hook, and figure out how to get back to her office on her own.
Head back there as well, and you'll be greeted by the Nurse halfway into the vent, with just her lower body sticking out. She claims that she got stuck herself, and asks you to help pulling her out. If you have at least 8 Nurse lust points, you can find an alternative plan, unlocking this scene.
Isabelle's Justice
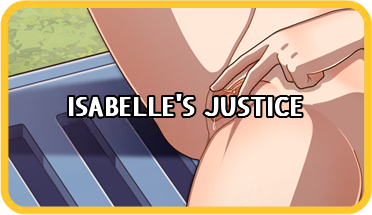
Quest: Hurricane Isabelle
Acquisition: This scene is unlocked by having sex with Isabelle on top of her locker after having locked Maxine in it.
Walkthrough: After failing to convince Maxine to return Isabelle's stolen locker in Gathering Storm, you decide to try to locate it yourselves, but to no avail. You then decide to get a hold of the surveillance footage to confirm that she's actually the one responsible for its disappearance. To do so, interact with the Guard's booth.
You learn that he's asleep, and start to brainstorm ideas to lure him out of his booth. Kate suddenly shows up wondering why you look so shifty, and you can either keep the conversation going — which, should you have at least 4 lust points, can lead to a deal where Kate agrees to distract the Guard for you in exchange for you giving Chad a blowjob in her place —, or yell at her to leave you alone.
If you get rid of Kate, you'll need to come up with a plan on your own. You decide to short circuit the fuse box in the first hall, but quickly realize that first you're going to need to distract the security camera in the ceiling. Luckily, Spinach is still hanging out in your bedroom. Take her, head back to the first hall and use her on the door, then interact with the fuse box to cause a blackout. Finally, click on your phone to turn its flashlight on, allowing you to make your way to the Guard's booth.
With the surveillance footage now in your possession, go home and use the flash drive on your computer. After watching it for a while, you're suddenly greeted by Maxine, who appears to have somehow meddled with the footage. She warns you to stop looking for Isabelle's locker, and that it is now located in a place lost to time and civilization. You conclude that Maxine did in fact steal the locker, and decide to ask Isabelle for help.
Quest her, and she'll quickly deduce that it must be outside the school. Now, go to the forest glade and interact with the creepy hut. As you try to find something to climp up on, you find Isabelle's locker lying in the grass. Call Isabelle to tell her the good news, and she'll promise to meet up with you shortly. Once she arrives, the two of you drag her locker out, before she asks you to call Maxine to settle things. Call Maxine and you'll unlock this scene.
Lindsey's Hypno-somnambulism

Quest: A Beautiful Motive
Acquisition: This scene is unlocked by painting with Lindsey.
Walkthrough: As you're losing yourself in thought watching Lindsey run in the gym, she notices your presence and promptly approaches you. The two of you make some small talk, and Lindsey reveals that she was hoping to do the anatomy assignment tomorrow with you, thinking it'd be less embarrassing that way. Here, you can either accept her invite, or decline it and instead suggest an hour in nature by yourselves.
Regardless of your choice, Lindsey tasks you with bringing the paint. Go to the art classroom and wait for Jacklyn to leave, before taking the tubes of paint from the paint shelf. During the act, you notice something hidden behind them, just out of reach. Interact with any of the chairs and, once you climb on it, you'll realize that it is one of Isabelle's stolen chocolate hearts from Stolen Hearts. You then start to wonder why it is there, if the chocolate box was also there before the mysterious texter handed it to you, and why Jacklyn would lie about throwing it in the trash.
Head over to Jacklyn and quest her. After trying to lie her way out of it, she eventually concedes and reveals that someone sent her a letter and a check in exchange for hiding the chocolate box, and that they asked her to burn the letter. You deduce that Maxine must be involved, and decide to talk to her next. While she does confess, it's to running experiments on students, and not to sending Jacklyn that letter. You press her for more information, and she reveals that side effects of her chemical compound include dizziness, memory loss, and hypno-somnambulism — some of which have been experienced by Lindsey.
Go to either the leftmost computer in the computer classroom, or the computer in your bedroom, and interact with it to google hypno-somnambulism. You'll learn that it is a state akin to sleepwalking, and realize that someone could've told Lindsey to steal Isabelle's chocolate hearts while she was in this state. Confused as to who would want to hurt Isabelle if not Kate — who would've rubbed it in her face by now —, you decide to ask Isabelle if she saw someone talking to Lindsey before the theft.
Unfortunately, while Isabelle does recall Lindsey being engrossed in her phone, she claims that there wasn't anyone with her. Out of leads, you decide to stop playing detective and get some shut eye before your painting date with Lindsey. Go to sleep.
Once you wake up, go to school and quest Lindsey. If you chose "Sorry, but painting someone naked isn't my idea of a good date." earlier, she'll say that she just needs to grab the easels, before asking you to meet her outside. Leave the school and you'll unlock this scene.
Mrs. L's Modeling

Quest: A Beautiful Motive
Acquisition: This scene is unlocked by painting Mrs. L naked with Lindsey.
Walkthrough: As you're losing yourself in thought watching Lindsey run in the gym, she notices your presence and promptly approaches you. The two of you make some small talk, and Lindsey reveals that she was hoping to do the anatomy assignment tomorrow with you, thinking it'd be less embarrassing that way. Here, you can either accept her invite, or decline it and instead suggest an hour in nature by yourselves.
Regardless of your choice, Lindsey tasks you with bringing the paint. Go to the art classroom and wait for Jacklyn to leave, before taking the tubes of paint from the paint shelf. During the act, you notice something hidden behind them, just out of reach. Interact with any of the chairs and, once you climb on it, you'll realize that it is one of Isabelle's stolen chocolate hearts from Stolen Hearts. You then start to wonder why it is there, if the chocolate box was also there before the mysterious texter handed it to you, and why Jacklyn would lie about throwing it in the trash.
Head over to Jacklyn and quest her. After trying to lie her way out of it, she eventually concedes and reveals that someone sent her a letter and a check in exchange for hiding the chocolate box, and that they asked her to burn the letter. You deduce that Maxine must be involved, and decide to talk to her next. While she does confess, it's to running experiments on students, and not to sending Jacklyn that letter. You press her for more information, and she reveals that side effects of her chemical compound include dizziness, memory loss, and hypno-somnambulism — some of which have been experienced by Lindsey.
Go to either the leftmost computer in the computer classroom, or the computer in your bedroom, and interact with it to google hypno-somnambulism. You'll learn that it is a state akin to sleepwalking, and realize that someone could've told Lindsey to steal Isabelle's chocolate hearts while she was in this state. Confused as to who would want to hurt Isabelle if not Kate — who would've rubbed it in her face by now —, you decide to ask Isabelle if she saw someone talking to Lindsey before the theft.
Unfortunately, while Isabelle does recall Lindsey being engrossed in her phone, she claims that there wasn't anyone with her. Out of leads, you decide to stop playing detective and get some shut eye before your painting date with Lindsey. Go to sleep.
Once you wake up, go to school and quest Lindsey. If you chose "I don't mind. Mrs. L has volunteered to model." earlier, she'll say that she asked Mrs. L to meet the two of you outside, and that she just needs to grab the easels. Leave the school and you'll unlock this scene.
Mrs. L's Argument
Quest: A Beautiful Motive
Acquisition: This scene is unlocked by hiding under the teacher's desk.
Walkthrough: After your painting date with Lindsey — Mrs. L being a part of it or not — is over, the two of you make some small talk before she gets a text message, which immediately consumes all of her attention. You then remember that Isabelled recalled Lindsey also being engrossed in her phone before the theft, and ask her who she's texting. Lindsey replies that it's just a fan, before promptly leaving for practice. Worried about her, you decide to get a hold of her phone in hopes of figuring out who made her steal Isabelle's box of chocolates.
As you try to make your way into the women's bathroom, you realize that it's crowded, and you'll need to get the girls out first. You contemplate removing a fuse to blow out the bathroom lights, but remember about the security camera in the first hall. Interact with it, and then interact with the window. You deduce that letting the butterflies in should be a perfect distraction for the camera... except the window i's locked, and only Jo and the Guard have keys to it.
If you have at least 5 intellect points, you can convince the Guard to open it up. Otherwise, you're going to have to ask Jo. Either way, interact with the window in the first hall again once it's open. You notice that the butterflies aren't budging, and that you'll need to lure them in. Take the plant from the arts wing and then use it on that window. With the butterflies now inside, distracting the security camera, interact with the fuse box to cut the power to the women's bathroom.
Go to the women's bathroom and interact with the middle locker. You'll find Lindsey's phone, as well as some of her other belongings, before quickly going over her text messages and stumbling upon a conversation with someone called Mer — here, you have to use your mouse wheel to scroll the conversation all the way up. As you do, you learn that Lindsey is innocent, and this Mer person was the one who manipulated her into doing it. In an attempt to catch them, you decide to send them a message as Lindsey, asking them to meet up with her in the homeroom after school.
Once school is about to end, go to the homeroom and interact with the teacher's desk to unlock this scene.
Jacklyn's Interruption
Quest: None
Acquisition: This scene is unlocked by flirting with the Michael Jackson statue in the music classroom.
Walkthrough: After completing both Art Through Suffering and A Short Fuse, you can now flirt with the Michael Jackson statue in the music classroom. If you have at least 10 lust points, choose "Beat It" to unlock this scene.
Isabelle's Kissing Tips
Quest: None
Acquisition: This scene is unlocked by meeting up with Isabelle on the roof.
Walkthrough: After completing either Gathering Storm (having calmed Isabelle down at the end) or Hurricane Isabelle, flirt with her anywhere to ask her if she has any tips for making out. Isabelle happily obliges, but warns you that good kisses are all about the setting, before asking you to meet her on the roof at sunset.
Once school is about to end, go to the roof and flirt with Isabelle again to unlock this scene.
Jo's Picnic
Quest: Jo's Day
Acquisition: This scene is unlocked by setting up a picnic for Jo.
Walkthrough: After Jo accidentally drops and breaks her favorite mug, she ends up lashing out at you, before quickly realizing her mistake and embarrassingly rushing to get the janitor. Despite not having done anything this time, you acknowledge she's not wrong, and that you should make an effort to get back into her good graces.
Quest Flora to explain the situation to her. She'll then suggest that you clean up your bedroom, and take Jo on a picnic. If you have at least 10 Flora love points or $200, you can convince her to take care of your bedroom while you focus on gathering the picnic supplies. Otherwise, you'll need to go home and take the vacuum cleaner from the storage closet in the hallway, then head to your bedroom to give it a once-over.
With your bedroom now looking presentable, go back to the hallway and take the picnic blanket from the hole to the attic. Then, head to the kitchen and take Jo's secret wine from the mini fridge. Next, go to the homeroom and wait for Mrs. L to leave, before taking one of her mugs from the teacher's desk. And finally, take the cactus from the english classroom, then take a paint jar from the paint shelf in the art classroom, and combine the two of them to make a cactus in a pot.
Once the picnic supplies are in your possession, go to the forest glade and use all of them but the mug on the existing picnic basket. While the picnic setup looks nice, you're still worried that saying the wrong thing might set Jo off again, so you decide to ask Maxine for something to help you soothe her erratic temper. Quest Maxine, and she'll ask you to get her some Queen's Rue from the Nurse. Quest the Nurse, wait an hour, then quest her again. She'll hand you the Queen's Rue, before revealing that Maxine usually makes her keto-friendly energy bars in exchange for it. Here, you can either give the Nurse $5 for her time's worth, or decline to do so.
Head back to Maxine and give her the Queen's Rue. She'll then ask you for a bottle of water. Give her the bottle of water, and she'll reveal that the mixture can only be brewed in the girl's bathroom. You follow Maxine until the bathroom entrance and, after some time, she returns with a love potion droplet, claiming it's all you need. After you use it on the picnic setup in the forest glade, it's time to clear the air with Jo. Quest her, and the both of you will immediately apologize to each other. You then give her a new mug, before revealing that you put together a picnic to celebrate Mother's Day, and you want her to meet you in the forest glade at sunset — to which Jo happily obliges.
Once school is about to end, go to the forest glade to unlock this scene.
Nurse's Walk
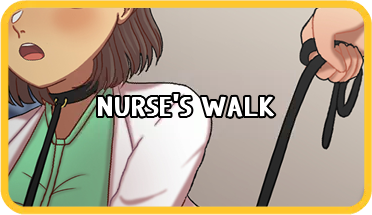
Quest: The Dog Trick
Acquisition: This scene is unlocked by asking the Nurse to be your dog.
Walkthrough: After entering the first hall, you stumble upon what appears to be a discussion between Kate and Isabelle. The latter seems to be complaining about regular students not having enough access to the gym, while the former claims that the current 2-hour allotted time to the public is more than sufficient... even if it happens to coincide with lunch hour. Suddenly, they notice your presence, and Isabelle promptly asks if you can get the principal to put an end to this. Here, you can either say you'll try talking to her, or argue that there's nothing you can do about it.
Regardless of how the conversation goes, Isabelle eventually leaves, and Kate announces that she now wants a proper slave collar for her. Kate then mentions how Mrs. L previously confiscated the one in her possession, and orders you to retrieve it for her. Go to the homeroom and wait for Mrs. L to leave, then use a high-tech lockpick — crafted by combining a safety pin (found in the lollipop jar in the Nurse's office) with a ball of yarn (found on the leftmost desk in the homeroom) — on the teacher's desk to acquire the dog collar.
Despite having possibly promised Kate that you wouldn't talk to the principal, you realize that the gym being off-limits means you won't be seeing Lindsey nearly as much, before quickly deciding to go back on your word. Quest Jo, and she'll cut you deal — once you've shown actual physical improvement, she'll change the gym schedule back. However, getting in shape without being able to access the gym proves to be quite the challenge.
Quest Maxine, and she'll immediately deduce that you're looking to circumvent the new gym schedule. After some back and forth, she reveals that according to the Newfall Constitution on Animal Rights, Chapter 87, subsection D, a dog — and by extension its owner — has the right to access any public training facility. Here, you can either ask Flora to lend you a dog or, if you have the Nurse's compromising photo, ask her to be your dog instead.
Pay the Nurse a visit. She'll reluctantly agree to be your dog, before getting down on her knees so that you can put the collar on her. With the Nurse now properly leashed, go to the gym to unlock this scene.
Nurse's Workout Lesson
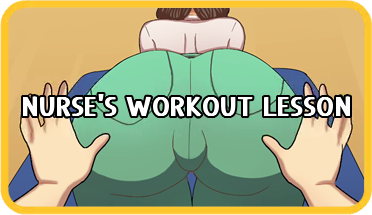
Quest: The Dog Trick
Acquisition: This scene is unlocked by prolonging the workout lesson with the Nurse.
Walkthrough: After successfully managing to bypass Kate and get in the gym, quest the Nurse. If earlier you asked Flora to lend you a dog, you'll explain to the Nurse that she was brought in to help you work out and then sign off on your grade — to which she reluctantly agrees. The Nurse starts by naming some of our leg muscles, and then asks you to point them out. You promptly lift her left leg and stretch it out towards your chest, which catches her by surprise. She concludes that you've earned your grade, before asking you to let her up. If you have at least 5 Nurse love points, choose "Just a moment, I'm not quite finished yet." to unlock this scene.
Alternatively, if earlier you asked the Nurse to be your dog, simply quest her to unlock this scene.
Isabelle's Punishment
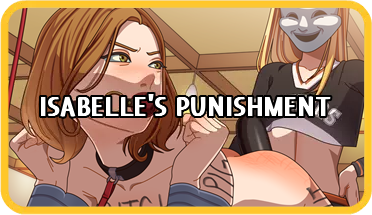
Quest: Stepping on the Rose
Acquisition: This scene is unlocked by helping Kate break Isabelle.
Walkthrough: After gathering all of the items Kate had previously asked for, as well as scheduling a meeting with Maxine, quest Kate. She's ready to attend it, but won't climb the rope to the clubroom, and instead orders you to make Maxine come down. It takes some back and forth, but she eventually does so. Kate then reveals that she has a massive story about a perverted flasher running around the school, and promises to get Maxine a good picture for the front page of the school's newspaper. Maxine agrees to publish it, as long as it's bigger than the glowing spider eggs story. Kate then tells you to meet her in the gym.
Quest her, and she'll call over her cheerleader squad to announce the plan. On Independence Day, you are to put sleeping pills into Isabelle's favorite ice tea, and have her drink it. Then, once she's asleep, you are to call Kate so that her posse can pick Isabelle up. Kate assures you that you're going to be safe, before dismissing everyone. If you have at least 6 lust points, you can ask her to let you fuck Isabelle too.
Wait until day 21, and interact with the Independence Day decorations in the entrance hall. If you're ready to conclude season 1, choose "Proceed". Otherwise, choose "I better get my act together quick" and finish any other active quests you might have before returning to this choice menu.
Next, combine the ice tea with the sleeping pills to make a spiked ice tea, then give it to Isabelle while she's in the English classroom. After she falls asleep, call Kate on your phone — twice — and she'll send her cheerleader posse to pick Isabelle up.
Once school is about to end, go to the gym to unlock this scene.
Lindsey's Foot Bath
Quest: Wicked Game
Acquisition: This scene is unlocked by worshiping Lindsey's foot.
Walkthrough: After playing something dark and dramatic on the piano, Kate shows up, having been attracted by the melody. The two of you make some small talk, before she reveals that she needs you to call Jo to the arts wing, and ask her for the key to the music classroom so that Kate can throw a secret party at night.
Call Jo, and she'll agree to meet up with you in a bit. Once she shows up, you come up with an excuse, and Jo promptly hands you the key to the music classroom. Shortly after, Kate shows up again and asks for the key. If you have at least 6 intellect points, you can lie to her that Jo said you couldn't give it away. Kate won't believe you at first, but will eventually concede, before warning you that the party is in two days.
Wait the two days, then go to school. Kate will immediately approach you in the entrance hall, reminding you that her party is tonight, and urging you not to be late. Once school is about to end, go to the arts wing. Kate will show up shortly after, now wearing an angel costume. Use the key to the music classroom on the door to the music classroom. You then ask Kate if you can join the party, but she promptly refuses. So, you decide to invite yourself by putting together a ghost costume from a bedsheet.
Go to the admin wing, and you'll stumble upon the Nurse next to a big box with a hole on each side. Quest her, and she'll reveal that it is her costume for Kate's party. If you have at least 4 lust points, you can ask her to borrow it instead. The Nurse ends up giving in and, as you hear Kate's voice in the distance, you quickly make your way into the box. Her cheerleader posse immediately locks it up, before carrying it upstairs.
Kate welcomes her guests to her yearly ladies-only costume party, and introduces the mystery box as the main attraction. She then invites Stacy to stick her leg in it, and you now have to worship her foot with kisses, licks and bites. The other girls soon follow suit, until Lindsey suddenly shows up and notices the commotion. Kate invites her to try it out, and she reluctantly agrees. As she sticks her leg in, you start having second thoughts about worshiping the foot of someone as pure as Lindsey. Choose "Worship" to unlock this scene.
Nurse's Free-Use Box

Quest: Wicked Game
Acquisition: This scene is unlocked by checking out the mystery box.
Walkthrough: After playing something dark and dramatic on the piano, Kate shows up, having been attracted by the melody. The two of you make some small talk, before she reveals that she needs you to call Jo to the arts wing, and ask her for the key to the music classroom so that Kate can throw a secret party at night.
Call Jo, and she'll agree to meet up with you in a bit. Once she shows up, you come up with an excuse, and Jo promptly hands you the key to the music classroom. Shortly after, Kate shows up again and asks for the key. If you have at least 6 intellect points, you can lie to her that Jo said you couldn't give it away. Kate won't believe you at first, but will eventually concede, before warning you that the party is in two days.
Wait the two days, then go to school. Kate will immediately approach you in the entrance hall, reminding you that her party is tonight, and urging you not to be late. Once school is about to end, go to the arts wing. Kate will show up shortly after, now wearing an angel costume. Use the key to the music classroom on the door to the music classroom. You then ask Kate if you can join the party, but she promptly refuses. So, you decide to invite yourself in by putting together a ghost costume from a bedsheet.
Go to the admin wing, and you'll stumble upon the Nurse next to a big box with a hole on each side. Quest her, and she'll reveal that it is her costume for Kate's party. Suddenly, you hear Kate's voice in the distance, and the Nurse tells you to hide in her office. Once they're gone, interact with the bed to acquire a ghost sheet, and then knock on the door to the music classroom.
Kate will open it up and mistake your for Chloe, one of her guests. You play along, and she eventually lets you in the party. To your surprise, Lindsey approaches you, and the three of you chat for a bit before they ditch you to get wasted. You then decide to check out the mystery box, unlocking this scene.
Isabelle's Exception
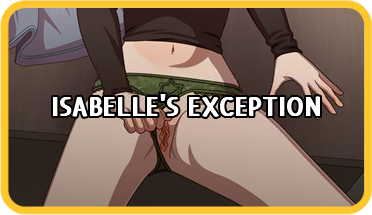
Quest: Dethroning the Queen
Acquisition: This scene is unlocked by teasing Isabelle in the homeroom, then asking her to lock the door.
Walkthrough: After gathering all of the items Isabelle had previously asked for, as well as scheduling a meeting with Maxine, quest Isabelle. You warn her that Maxine isn't the easiest person to deal with, and Isabelle comes up with the idea to sell her that there's a ghost pig roaming around the school. Here, you can decide which one of you will put on the pig mask, and which one will take a blurry photo as evidence.
Quest Maxine, and she'll reluctantly agree to the meeting... as long as it is where the sun shines, but the raindrops never reach. She then quickly vanishes, leaving you and Isabelle to figure out her riddle. The two of you climb down the rope to the homeroom and, if you have completed either Gathering Storm (having calmed Isabelle down at the end) or Hurricane Isabelle, you can ask her what she thinks about Flora. She'll call her wild, but reassure you that she's interested in someone else. Choose "I see how it is. Lock the door." to unlock this scene.
Nurse's Pose
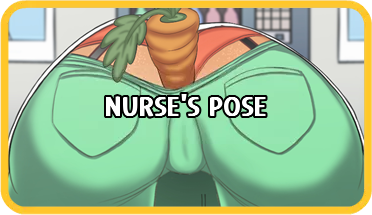
Quest: Dethroning the Queen
Acquisition: This scene is unlocked by taking a picture of the Nurse for Maxine.
Walkthrough: After figuring out Maxine's riddle, you and Isabelle go to the roof, where Maxine has been waiting for you. You then reveal that the devil pig has been spotted inside the school, now in a more incorporeal form, before showing her the blurry photo you took earlier. Fortunately for you, Maxine agrees to publish the story.
Wait a day, then interact with the newspaper stand in the first hall to acquire the latest issue. You decide to get it inside the trophy case in an attempt to get Kate to see it, but quickly realize that it's locked. Wait for Jo to come to school, then quest her. If you have at least 5 strength points or at least 5 intellect points, you can convince her to unlock it for you. Wait an hour, and then use the newspaper on the trophy case.
Wait until day 21, and interact with the Independence Day decorations in the entrance hall. If you're ready to conclude season 1, choose "Proceed". Otherwise, choose "I better get my act together quick" and finish any other active quests you might have before returning to this choice menu.
Go to the cafeteria, and you'll stumble upon Isabelle getting up on a chair to announce that she wants to host the Independence Day dinner. You wait for her to be done, before congratulating her for her bravery. Kate then shows up and informs Isabelle that students aren't allowed to host parties at the school, but you assure her that you'll try talking to the principal. Quest Jo, and she'll agree to make an exception on the condition that a member of the staff is present. Quest Isabelle next, and she'll ask you to be in charge of invitations.
Quest all of Flora, Kate, Lindsey, and Maxine. Then, quest Isabelle again.
Once school is about to end, go to the cafeteria. Isabelle welcomes you to the dinner, and the two of you make some small talk before joining the rest of the guests. Quest Maxine, and she'll reveal that there's research to be done, with you having a part in it. If you consent to it, she'll hand you her camera and ask you to bring her a photograph that captures the spirit of the dinner.
Click on Kate to take a picture of her, but then choose "Wait for a better shot". Next, click on the kitchen to take a picture of it, and you'll overhear Kate in there ordering someone. Choose "Stay and take a picture" to unlock this scene.
Kate's Scare
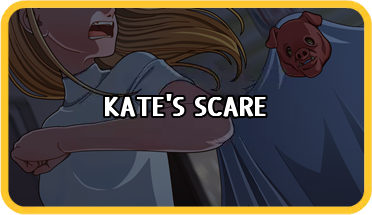
Quest: Dethroning the Queen
Acquisition: This scene is unlocked by setting the trap for Kate.
Walkthrough: After sneaking away from the Independence Day dinner, go to the first hall. Isabelle will ask you to hand her the pig mask, and entrust you to build the trap. First, use the red paint on the vending machine. Then, use the fishing hook on the red paint. Finally, use the fishing line on the red paint. Once the trap is set, Isabelle will immediately start to chase Kate down, unlocking this scene.
Kate's Terror
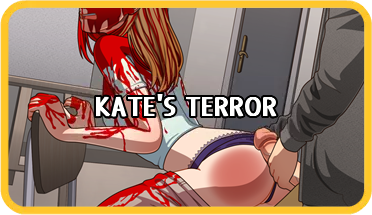
Quest: Dethroning the Queen
Acquisition: This scene is unlocked by tricking Kate into thinking you're Chad.
Walkthrough: After scaring Kate into locking herself inside the art classroom, Isabelle states that she wants to chase her further. Here, you can either convince her to not push your luck, or agree to hunt her down. If you choose the latter, you'll need a way to unlock the door to the art classroom.
If you don't have a high-tech lockpick — crafted by combining a safety pin (usually found in the lollipop jar in the Nurse's office) with a ball of yarn (found on the leftmost desk in the homeroom) —, you can use just the safety pin — found in the teacher's desk in the English classroom for the duration of this quest — on it. Now inside the art classroom, interact with the supply closet. Open it up, and you'll find a small and fearful Kate, her face completely covered, her eyes glued shut by the dried paint. Choose "Grunt", and she'll mistake your for Chad, then choose "Grab her" to unlock this scene.
Lindsey's Flight
Quest: Stepping on the Rose or Dethroning the Queen
Acquisition: This scene is unlocked by leaving the school after Lindsey disappears from the Independence Day dinner.
Walkthrough: After returning to the Independence Day dinner, you and Isabelle share some words before being abruptly interrupted by laughter in the distance. Suddenly, the lights are turned off, and you notice an eyeless doll standing in the doorway of the cafeteria. It speaks briefly, then disappears. Isabelle urges everyone to stay calm, but Flora quickly realizes that Lindsey is now gone. As the students start to panic, you offer to look for her while Isabelle gets everyone out.
Go to the roof landing, and you'll find Lindsey's hoodie stuck in the door to the roof. You try to open it up, but realize it's locked. Head downstairs and interact with the Guard's booth. You'll learn that the key to the roof is missing, meaning Lindsey must've somehow got a hold of it. Call Jo and explain the situation to her. She says she'll get into the car right away, and asks you to meet her outside the school.
Leave the school, and you'll unlock this scene.
Alternatively, if you helped Kate break Isabelle, the former will then lead the latter out of the gym for a victory lap around the school, unlocking this scene.
Jo's Embarrassment
Quest: Washed Up
Acquisition: This scene is unlocked by convincing Jo to join the car wash fundraiser.
Walkthrough: After Lindsey falls down from the school roof in either Stepping on the Rose or Dethroning the Queen, you decide to escape reality for a bit and instead indulge in one of the few good daydreams from your old life. It starts with Jo and Flora struggling to come up with ways to earn money for the school dance, until you suggest a car wash fundraiser. Jo compliments you for the great idea, but suddenly realizes that there's already a line of cars waiting to get a scrub and a rinse, before nervously asking you to lend them a hand in gathering all the supplies needed.
Go to the janitor's closet, and you'll notice that the door is locked. Lindsey then shows up, the two of you make some small talk, and she offers to help you unlock it. You can either decline or accept her offer, with both outcomes leading you to acquire a bottle of soap. Next, go to the roof and either take the garden hose, or quest Maxine. She'll reveal that she's using it to get rid of the plant zombies in the greenhouse, and ask you to help her vanquishing the threat. You can either decline or accept her request, with both outcomes leading you to acquire the garden hose.
Then, go to the art classroom and quest Jacklyn. She'll gladly hand over the sponges in her possession, but first warns you that some of them are way too abrasive for a car, and so asks you to rub her with each one in an attempt to find out which ones are adequate enough. You can either decline or accept her request, with both outcomes leading you to acquire a couple of sponges. Finally, go to the gym and either take the car wash signs, or quest Kate. She'll quickly learn that you've been tasked by Jo to get them, and as such, is desperate enough to do just about anything for them. In typical Kate fashion, she then asks you to get on your knees and beg for them. You can either do as she says, or snatch a sign and run away instead, with both outcomes leading you to acquire a single car wash sign.
Once you get a hold of all the car wash supplies, go to the school exterior and quest Flora. The two of you set everything up, and she quickly changes into her bikini before welcoming the donors. Suddenly, Maxine joins the fundraiser (if you agreed to help water the plant zombies earlier), followed by Kate (if you agreed to get on your knees and beg for the signs earlier), then Isabelle, and finally Jacklyn. But despite all of their unexpected arrivals, you realize that Jo is still missing, and decide to look for her.
Go to the sports wing, and you'll hear a sniffing sound from the women's bathroom. Go inside it, and you'll learn that Jo is crying in one of the stalls. As you approach her, she comes out wearing a very small bikini from her earlier years, stating that it barely fits her anymore, and that it would be humiliating to wear it in front of the other students. Here, you can either make her feel better by complimenting her looks, or put her down by claiming that no one is going to pay her much attention anyway. Regardless of your choice of words, Jo ends up agreeing to join the rest of the girls in the fundraiser.
Leave the school, and you'll unlock this scene.
Lindsey's Pleasure
Quest: Touched by an Angel
Acquisition: This scene is unlocked by making Lindsey feel good in the hospital bed.
Walkthrough: After Mrs. L reveals in Fall in Newfall that Lindsey is still in a coma and her parents don't want visitors, wait a full week. Then, go to school and you'll be greeted by an announcement over the loudspeakers that Lindsey has woken up, and her vitals are stable. If you have played through her entire questline in season 1 (Fully Booked, Nothing Wrong With Me, Dead Girl's Score, and A Beautiful Motive), you decide to ignore her parents' wishes and visit her anyway.
Go to the marina, and you'll stumble upon Jo. The two of you argue about Lindsey's road to recovery and your role in it, before Jo apologizes for not telling you the good news sooner, and wishes you good luck. Once she leaves, go to the Newfall Hospital. A receptionist will immediately approach you, claiming that only family members are allowed into the hospital ward — meaning you'll need to find some other way of getting into it.
Quest the Nurse. Here, you can both beg her for sympathy or, if you have either the Nurse's compromising photo or the damning document, blackmail her into helping you. Regardless of your approach, she'll agree to leave you a keycard in her office after school. Wait until 07:00 PM/19:00, then sneak into her office and take it. Now with the means to get in, you realize you also need to fit in by borrowing a lab coat from the science classroom. Go to the entrance hall, and you'll run into the Guard making his rounds. Luckily for you, he's completely engrossed in his phone, and you decide to use that to your advantage.
Go to the admin wing and interact with the bookshelf. There's an old phone book in it with all the school officials' contacts... or, well, all but the Guard. So, you decide to call the school's payphone in the detention classroom instead, in an attempt to lure him over there. Go back to the entrance hall, and you'll catch the Guard begrudgingly leaving his post. Finally, go to the science classroom and take the lab coat, then leave the school.
As soon as you do, you'll receive a phone call, seemingly from the school. When you answer it, you realize it's actually from Cyberia, who has escaped the computer classroom. She warns you that Lindsey's fall wasn't an accident, and that you should be keeping a closer eye on certain people around you, before hanging up the call. Unable to get more answers out of her, you decide to pay Lindsey a visit anyway and worry about Cyberia's warnings later.
Go back to the Newfall Hospital, and this time the receptionist from earlier will mistake you for a doctor. Use the keycard on the door to the hospital ward and you'll find a broken Lindsey — left arm and both legs in casts, neck brace, and bandage around her head — in her room. As you struggle to take her current state in, she notices your presence and the two of you make some small talk, before she breaks down in tears and you decide to sit down beside her.
Lindsey sobs softly into your shoulder while you hold her, reassuring her that it wasn't a suicide attempt. You both lie in silence for a bit, until she reveals to being afraid of closing her eyes and never waking up again. You then promise her to stay by her side until she wakes, and she eventually manages to fall asleep in your arms. As you count each breath she takes, you reach out and place the palm of your hand against her chest to feel her heart, accidentally waking her up.
She thanks you for staying with her, and the two of you flirt a little before your voice cracks as you express your concern over the uncertainty of her wellbeing. Lindsey then reaches out and brushes her fingertips against your cheek, and you lean in for a kiss. As your lips part, she looks up at you with the most heart-melting look. If you have at least 15 Lindsey lust points, choose "Just relax, okay? I'll make you feel better." to unlock this scene.
Maxine's Solo Exercise
Quest: Big Witch Energy
Acquisition: This scene is unlocked by running in place to create the power required for Maxine's computer.
Walkthrough: After stumbling upon an anxious Maya pacing back and forth next to the vending machine, you decide to approach her. She reveals that she's been cursed, and proves it to you by getting a soda, only for it to explode all over her when she opens the can. You argue that it could be busted, and offer to open one yourself — to which you're met with a little release of air, but no explosion. Maya then asks you to get another can, but have her open it instead. And when she does, it erupts like a sugary volcano, leaving her completely drenched in soda. She leaves to go get cleaned up, and you decide to keep an eye out on her, just in case she's really been cursed.
Go to the homeroom and wait for Mrs. L to leave before you can use the high-tech lockpick — crafted by combining a safety pin (found in the lollipop jar in the Nurse's office) with a ball of yarn (found on the leftmost desk in the homeroom) — on her desk to acquire Maya's schedule. Then, interact with it in your inventory to learn that Maya is in English class. Go to the arts wing, and you'll need to choose a hiding spot to observe her uninterrupted. Regardless of your choice, you decide to tail Maya a little longer, who's headed towards gym class now.
Go to the gym, and you'll notice either Kate (should you have played through Stepping on the Rose) or Casey, Lacey, and Stacy (should you have played through Dethroning the Queen) approaching Maya. They make fun of her due to the words "Maya has a dick" written on the scoreboard, but she manages to throw them off — with or without your help — before leaving for her next stop: computer class.
Go to the computer classroom, where Maya will be waiting for you. She has caught on that you've been following her, and wants you to stop. You try to explain yourself, but ultimately agree to leave her be... except, when you try to open the door, you realize it's locked. Maya convinces you to scream for help, but to no avail, so you decide to call Jo on your phone while she passes time on a computer. After some back and forth, Jo agrees to give the Guard a call and have him come unlock the door.
Quest Maya to tell her the good news. The two of you then make some small talk, and she goes back to the computer. You decide to take a seat next to her, but she quickly jumps to her feet and points at the computer monitor catching fire. Here, you can either whip out your dick and pee on the fire, or wait for Maya to get impatient and whip off her own hoodie to beat out the flames — both being valiant battles from which you emerge victorious. Once the flames die, you hear a click from the door and rush to leave the computer classroom at last. On your way out, you concede that Maya might've been cursed after all, before suggesting asking Maxine for help, to which Maya agrees.
Quest Maxine, and she'll display an alarming knowledge of curses. Choose any dialogue other than "You know what? Nevermind.", and she'll grant you permission to come to her office between the next two to three hours. Go to her office in said timeframe, then quest her again. Maxine reveals that she first needs your assistance in bringing her computer to life again, and to do so, you'll hook yourself up to electrodes connected to a generator and create the power required. Choose "So, I just run in place or what?" to unlock this scene.
Maxine's Pair Exercise

Quest: Big Witch Energy
Acquisition: This scene is unlocked by having sex with Maxine to create the power required for her computer.
Walkthrough: After stumbling upon an anxious Maya pacing back and forth next to the vending machine, you decide to approach her. She reveals that she's been cursed, and proves it to you by getting a soda, only for it to explode all over her when she opens the can. You argue that it could be busted, and offer to open one yourself — to which you're met with a little release of air, but no explosion. Maya then asks you to get another can, but have her open it instead. And when she does, it erupts like a sugary volcano, leaving her completely drenched in soda. She leaves to go get cleaned up, and you decide to keep an eye out on her, just in case she's really been cursed.
Go to the homeroom and wait for Mrs. L to leave before you can use the high-tech lockpick — crafted by combining a safety pin (found in the lollipop jar in the Nurse's office) with a ball of yarn (found on the leftmost desk in the homeroom) — on her desk to acquire Maya's schedule. Then, interact with it in your inventory to learn that Maya is in English class. Go to the arts wing, and you'll need to choose a hiding spot to observe her uninterrupted. Regardless of your choice, you decide to tail Maya a little longer, who's headed towards gym class now.
Go to the gym, and you'll notice either Kate (should you have played through Stepping on the Rose) or Casey, Lacey, and Stacy (should you have played through Dethroning the Queen) approaching Maya. They make fun of her due to the words "Maya has a dick" written on the scoreboard, but she manages to throw them off — with or without your help — before leaving for her next stop: computer class.
Go to the computer classroom, where Maya will be waiting for you. She has caught on that you've been following her, and wants you to stop. You try to explain yourself, but ultimately agree to leave her be... except, when you try to open the door, you realize it's locked. Maya convinces you to scream for help, but to no avail, so you decide to call Jo on your phone while she passes time on a computer. After some back and forth, Jo agrees to give the Guard a call and have him come unlock the door.
Quest Maya to tell her the good news. The two of you then make some small talk, and she goes back to the computer. You decide to take a seat next to her, but she quickly jumps to her feet and points at the computer monitor catching fire. Here, you can either whip out your dick and pee on the fire, or wait for Maya to get impatient and whip off her own hoodie to beat out the flames — both being valiant battles from which you emerge victorious. Once the flames die, you hear a click from the door and rush to leave the computer classroom at last. On your way out, you concede that Maya might've been cursed after all, before suggesting asking Maxine for help, to which Maya agrees.
Quest Maxine, and she'll display an alarming knowledge of curses. Choose any dialogue other than "You know what? Nevermind.", and she'll grant you permission to come to her office between the next two to three hours. Go to her office in said timeframe, then quest her again. Maxine reveals that she first needs your assistance in bringing her computer to life again, and to do so, you'll hook yourself up to electrodes connected to a generator and create the power required. If you have at least 8 Maxine lust points, choose "Actually, how about you and I generate the power together?" to unlock this scene.
Isabelle's Fun

Quest: A Single Moment
Acquisition: This scene is unlocked by asking Isabelle to come over to your house.
Walkthrough: After stumbling upon an asleep Kate in the arts wing, if you have at least 3 moments of glory, you can wake her up in retaliation for all the sleepless nights she has caused you. There are currently six unlockable moments of glory in the game:
You then ask Kate if she shouldn't be at cheer practice, mentioning that you saw Stacy and the others heading to the gym, but she gets flustered and leaves in a hurry... but not before dropping a bottle of pills. The name sounds expensive, so you decide to return them.
Go to the gym and you'll be greeted by Lacey, Casey, and Stacy. They announce that the latter has become the new head cheerleader after the events of Dethroning the Queen, and as such, Kate is not welcome there anymore. Go to the Nurse's office next, and quest her. You explain that Kate has been acting out of character lately, but the Nurse reveals that she hasn't seen her around. Out of luck with her two most likely hangout spots, you decide to get creative. Go to the art classroom and quest Jacklyn. She'll claim to know that Kate suffers from a case of artistic repression, but not her whereabouts.
You decide it's time you talk to the eyes and ears of the school. Quest Maxine, and she'll reveal that she has indeed seen Kate around — specifically, exchang a parcel with a figure in green. Go back to the Nurse's office, and quest her again. You confront her about her having lied to your earlier, and the Nurse eventually admits that Kate has been having trouble sleeping, which led to her giving her some pills for it, but promises that she doesn't know where she is now. You then deduce that either she's ditching class, or she has permission.
Quest Jo. The two of you make some small talk, but she refuses to share Kate's whereabouts, claiming it's a confidential matter. This however proves to you that Jo does know about it and, knowing her, likely keeps a record of it. Go to the principal's office and, upon learning that its door is locked, use a rock (found in the trash bin in the first hall) on it to bash it open. While you're the middle of it, Maxine emerges from the principal's office and asks you what you're doing. You come up with an excuse, and she leaves the door unlocked for you on her way out.
Interact with the computer and you'll learn that Kate is currently at a doctor's appointment, with more appointments during school hours having already been scheduled for the following weeks. Elated with the thought of twenty percent less of her every week, you decide to tell Isabelle the good news. Text her, and if you have had sex with her before (possible at the earliest during either Gathering Storm or Hurricane Isabelle) and have at least 10 Isabelle lust points, choose "I'll tell you in person if you come over tonight.".
Then, wait until 07:00 PM/19:00 and go to your bedroom (or vice versa). Quest Isabelle once she shows up, and you'll unlock this scene.
Flora's Secret
Quest: Suitable Romance
Acquisition: This scene is unlocked by assuring Flora that either you're not going to the art gallery exhibit with Jacklyn, or that the two of you are strictly platonic.
Walkthrough: After Jacklyn reveals that the Newfall Culinary magazine loved your "King of Sweets" art piece and then invites you to join her in an art gallery exhibit next weekend, you decide that you'll need a well tailored suit not to look out of place. Go to Newfall Tailor and Aquarium and you'll find a note on the locked door announcing that it has been closed indefinitely. Thankfully, Flora is a regular there and might know what happened.
Quest her, and she'll reveal that the owner has mysteriously disappeared recently. You then ask her where else could you get a suit, and she refers you to Maya — who keeps up with fashion more than anyone she knows, and is good with a needle and a thread. Quest the latter, and she'll agree to sew you one on the condition that you first find her stolen balls of yarn. If you have the cat tail (acquired by playing through Table Manners), you can instead give it back to her in exchange for the suit.
If not, there will now be five colored balls of yarn scattered around the school:
Gather all of them, then quest Maya again. She'll thank you for your efforts, and vow to leave the suit at your place when it's finished. Wait two days and, upon waking up on the second day, you'll notice that she has delivered on her promise. As you ponder how you're going to be looking like an art piece yourself in it, Flora storms into your bedroom and pleads you not to go to the art gallery exhibit with Jacklyn. If you have at least 15 Flora love points or at least 10 Flora lust points, choose either "I didn't realize it upset you so much. I won't go." or "Hey, Jacklyn and I are strictly platonic, okay? I'm just going for the art.", respectively, to unlock this scene.
Jacklyn's Solo Workout
Quest: Spell You Later
Acquisition: This scene is unlocked by asking Jacklyn for some of her sweat.
Walkthrough: After Maya tells you she'd rather not waste her time with the spellbook you got for her, you decide to give it a try anyway, just in case. Interact with either the "Bippity Boppity, Bitch" (should you have done physical labor for Maxine in Big Witch Energy in exchange for curse help) or the "Hex, Vex, and TexMex" (should you have asked the internet for help instead) book in your inventory, and it will ask you to acquire a single strand of hair from an enemy, a few drops of sweat from a female horndog, and a spritz of frog's breath.
For the first ingredient, quest either Isabelle (should you have played through Stepping on the Rose) or Kate (should you have played through Dethroning the Queen) and choose how you want to approach the situation. All outcomes lead you to acquiring a piece of their hair.
Next up, you conclude that there is no one hornier at school than Jacklyn. Quest her, then choose "Can I have some of your sweat?" to unlock this scene.
Jacklyn's Pair Workout
Quest: Spell You Later
Acquisition: This scene is unlocked by telling Jacklyn you want to get sweaty with her again.
Walkthrough: After Maya tells you she'd rather not waste her time with the spellbook you got for her, you decide to give it a try anyway, just in case. Interact with either the "Bippity Boppity, Bitch" (should you have done physical labor for Maxine in Big Witch Energy in exchange for curse help) or the "Hex, Vex, and TexMex" (should you have asked the internet for help instead) book in your inventory, and it will ask you to acquire a single strand of hair from an enemy, a few drops of sweat from a female horndog, and a spritz of frog's breath.
For the first ingredient, quest either Isabelle (should you have played through Stepping on the Rose) or Kate (should you have played through Dethroning the Queen) and choose how you want to approach the situation. All outcomes lead you to acquiring a piece of their hair.
Next up, you conclude that there is no one hornier at school than Jacklyn. Quest her, and if your escapade in The Statement ended in sex (regardless of which dick went into which ass), choose "I want to get sweaty with you again." to unlock this scene.
Flora's Experimentation

Quest: A Walk in the Park
Acquisition: This scene is unlocked by following Flora's lead after she kisses you in the mushroom spot.
Walkthrough: After realizing you never got the chance to ask Flora what she's thinking and feeling in regards to the shower incident in Squid Game, you decide not to wait any longer. She claims to have liked it, but expresses concern over possibly being heard by someone and drops the topic. You then ask her if she wants to play xCube in your room, to which she promptly agrees.
Go there and quest her again. She'll get frustrated with one of the game levels, so you suggest taking a break and going outside to get some fresh air. Flora finds the idea suspicious at first, but you then argue that staying inside makes you feel watched, and she admits to feeling the same way. Before the two of you leave the house, she tells you she's going to get her squid, Cuthbert, as he needs a walk too.
Once you make your way to the park, Flora puts Cuthbert in the pond for a swim while you daydream about her. She then approaches you, and you tell her there's something you wanted to show her. Reluctantly, she goes along with you and follows a bike path into the forest. Soon after, the two of you arrive at a mushroom kingdom-like spot, leaving her flabbergasted. Flora then jumps into you for a kiss, knocking you both to the ground, before blushingly confessing that she wants to try something. Choose "Follow her lead" to unlock this scene.
Flora's Invitation

Quest: A Walk in the Park
Acquisition: This scene is unlocked by taking the lead after Flora kisses you in the mushroom spot.
Walkthrough: After realizing you never got the chance to ask Flora what she's thinking and feeling in regards to the shower incident in Squid Game, you decide not to wait any longer. She claims to have liked it, but expresses concern over possibly being heard by someone and drops the topic. You then ask her if she wants to play xCube in your room, to which she promptly agrees.
Go there and quest her again. She'll get frustrated with one of the game levels, so you suggest taking a break and going outside to get some fresh air. Flora finds the idea suspicious at first, but you then argue that staying inside makes you feel watched, and she admits to feeling the same way. Before the two of you leave the house, she tells you she's going to get her squid, Cuthbert, as he needs a walk too.
Once you make your way to the park, Flora puts Cuthbert in the pond for a swim while you daydream about her. She then approaches you, and you tell her there's something you wanted to show her. Reluctantly, she goes along with you and follows a bike path into the forest. Soon after, the two of you arrive at a mushroom kingdom-like spot, leaving her flabbergasted. Flora then jumps into you for a kiss, knocking you both to the ground, before blushingly confessing that she wants to try something. Choose "Take the lead" to unlock this scene.
Flora's Cool Down

Quest: A Walk in the Park
Acquisition: This scene is unlocked by having Flora be pulled into the pond by Cuthbert.
Walkthrough: After you and Flora make your way back to the park, she notices her squid still in the pond, and decides to get him out of it before it gets cold. In the meantime, you ponder about your relationship with her, when suddenly Flora shrieks as Cuthbert pulls her into the pond, unlocking this scene.
Isabelle's Blackmail

Quest: A Walk in the Park
Acquisition: This scene is unlocked by turning the tables on Isabelle after her blackmail attempt.
Walkthrough: After Flora leaves the park with Cuthbert, you decide to go home and get some sleep.
Once you wake up, you realize you've slept through your alarm and you're late for class. Go to school, and you'll be approached by Isabelle, who's disgusted by what you did in the park the day before. You try to argue that it's not what it seems, but she's adamant that what she saw is not okay. You then beg her not to tell anyone and, after much insistence, she agrees to keep it quiet as long as you and Flora meet her in the forest glade.
Quest Flora and tell her that the two of you have been caught. She'll break down in tears, worried about how her friends and relatives would react if they found out, but you reassure her that you'll get through it together.
Go to the forest glade and quest either Flora or Isabelle. The latter announces that you're going to help her clean the place up with the garbage bags she's brought, akin to community service. If you have played through Stepping on the Rose, choose "Did Kate put you up to this?" to remind her that Kate wouldn't approve her blackmailing people without her knowledge, and leave Isabelle with no retort. Having turned the tables on her, you tell her that she's going to clean the place up by herself while you and Flora watch instead.
As she's about to get started, Flora tells her to get undressed in order to avoid getting oil on her clothes. Isabelle reluctantly agrees and strips down to her underwear, but you then take it a step further and tell her take it all off, just to be safe. She hesitates but does as she's told, before wading into the oil and unlocking this scene.